Multimedia in programs
This part servers as a short introduction to using multimedia in JavaFX applications.
Drawing
The JavaFX interface library uses a Canvas object for drawing. A Canvas object can be thought of as a empty canvas we can draw on. We use a GraphicsContext object provided by a Canvas object to draw on it.
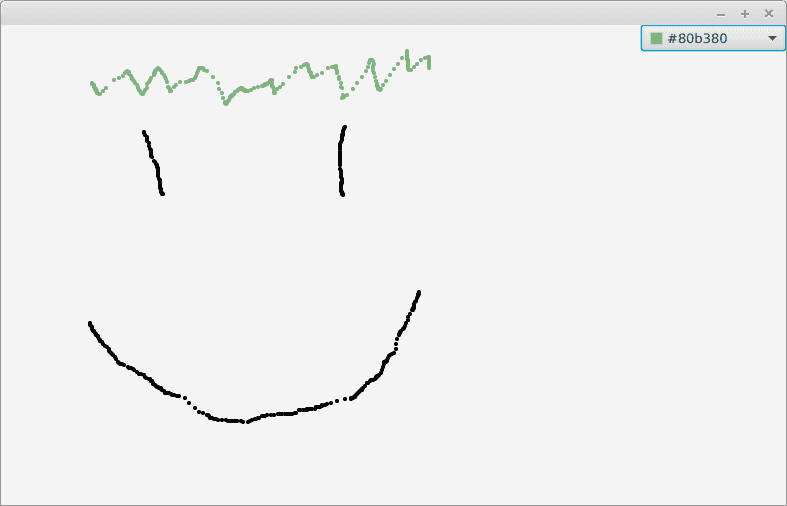
Below we have created a simple drawing application. The application creates a 640 pixels wide and 480 pixels tall canvas, which is then placed to the middle of a BorderPane object. It also creates a ColorPicker object for selecting the color to draw with. ColorPicker can also tell us the currently selected color. The ColorPicker is placed to the right side of the BorderPane. We have added a event handler to the Canvas. The event handler listens to mouse movements. When user moves the mouse while pressing the right mouse button (onMouseDragged), the event handler calls the color selector method of the GraphicContext object, and draws a small circle to the cursor location.
// packages

import javafx.application.Application;
import javafx.scene.Scene;
import javafx.scene.canvas.Canvas;
import javafx.scene.canvas.GraphicsContext;
import javafx.scene.control.ColorPicker;
import javafx.scene.layout.BorderPane;
import javafx.stage.Stage;

public class MiniPaint extends Application {

    @Override
    public void start(Stage window) {

        Canvas paintingCanvas = new Canvas(640, 480);
        GraphicsContext painter = paintingCanvas.getGraphicsContext2D();

        ColorPicker colorPalette = new ColorPicker();

        BorderPane paintingLayout = new BorderPane();
        paintingLayout.setCenter(paintingCanvas);
        paintingLayout.setRight(colorPalette);

        paintingCanvas.setOnMouseDragged((event) -> {
            double xLocation = event.getX();
            double yLocation = event.getY();
            painter.setFill(colorPalette.getValue());
            painter.fillOval(xLocation, yLocation, 4, 4);
        });

        Scene view = new Scene(paintingLayout);

        window.setScene(view);
        window.show();
    }

    public static void main(String[] args) {
        launch(MiniPaint.class);
    }
}
The application looks like so. In the image below we have already drawn something with the application.

Images
There are many ways to display an image as a part of application's interface. One straightforward way is to use the Image and ImageView classes from JavaFX.
We pass the name of the image file to the Image class as an argument. The file name must be preceded with the prefix file:, with which we tell the application the image is a file in the file system.
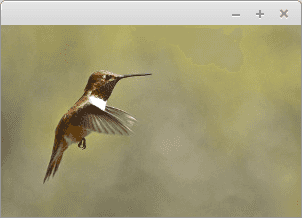
In the example below we first load the file humming.jpg and then pass it to a ImageView object we create as an argument.
The ImageView object is then placed to a Pane object. Note that Pane is not used to arrange layout items — it does not care how items within it are placed on a screen.
Finally we place the Pane to a Scene object, and display the Scene.
import javafx.application.Application;
import static javafx.application.Application.launch;
import javafx.scene.Scene;
import javafx.scene.image.Image;
import javafx.scene.image.ImageView;
import javafx.scene.layout.Pane;
import javafx.stage.Stage;

public class ImageApplication extends Application {

    @Override
    public void start(Stage stage) {

        Image imageFile = new Image("file:humming.jpg");
        ImageView image = new ImageView(imageFile);

        Pane frame = new Pane();
        frame.getChildren().add(image);

        stage.setScene(new Scene(frame));
        stage.show();

    }

    public static void main(String[] args) {
        launch(args);
    }
}
Below you can see the window that opens when the program is run.
Here we expect that the file humming.jpg exists and is located at the root of the project (the same directory as for example pom.xml).

In the example we use an image by Linda Tanner from http://www.freestockphotos.biz/stockphoto/17874. The image has a Creative Commons CC BY 2.0 lisence.
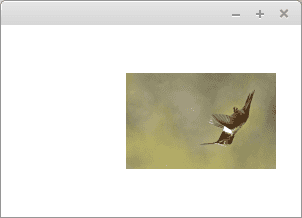
ImageView object has a bunch of methods available for (simple) image processing tasks. We can for example change the size of an image, flip it around or move it on the screen. Below we have flipped the image, halved its size and moved it a bit to the right.
@Override
public void start(Stage stage) {

    Image imageFile = new Image("file:humming.jpg");
    ImageView image = new ImageView(imageFile);

    image.setRotate(180);
    image.setScaleX(0.5);
    image.setScaleY(0.5);

    image.setTranslateX(50);

    Pane frame = new Pane();
    frame.getChildren().add(image);

    stage.setScene(new Scene(frame));
    stage.show();
}
We can access an image trough the ImageView class, but it does not let us access separate pixels (the small "frames" containing a single color an Image is formed off of) within it.
We can access the separate pixels of an image using a PixelReader object available from the Image class. PixelReader object can be used to go trough an image pixel by pixel, simultaneously writing a new image to a separate WritableImage object.
Below we copy an image pixel by pixel to a separate WritableImage object, and display it in the application.
@Override
public void start(Stage stage) {

    Image imageFile = new Image("file:humming.jpg");

    PixelReader pixels = imageFile.getPixelReader();

    int width = (int) imageFile.getWidth();
    int height = (int) imageFile.getHeight();

    WritableImage targetImage = new WritableImage(width, height);
    PixelWriter writer = targetImage.getPixelWriter();

    for (int y = 0; y < height; y++) {
        for (int x = 0; x < width; x++) {

            Color pixelColor = pixels.getColor(x, y);
            double red = pixelColor.getRed();
            double green = pixelColor.getGreen();
            double blue = pixelColor.getBlue();
            double opacity = pixelColor.getOpacity();

            Color newColor = new Color(red, green, blue, opacity);

            writer.setColor(x, y, newColor);
        }
    }

    ImageView image = new ImageView(targetImage);

    Pane pane = new Pane();
    pane.getChildren().add(image);

    stage.setScene(new Scene(pane));
    stage.show();
}
The image looks just like it did before copying.

Sounds
There are multiple ways to handle sound files, and here we will go trough one of them. We will handle sound files as audio clips, which can be for example sound effects.
We expect the file is called bell.wav and is located at the root of the project.
The simplest way to play a sound is as follows:
AudioClip sound = new AudioClip("file:bell.wav");
sound.play();
AudioClip object is dependent on the JavaFX library, so the sound file must be played as a part of a JavaFX application.
The example below searches for the file bell.wav from the root of the project, and creates an audio clip from it. Then the audio clip is played, and the application window (currently empty) opens.
import javafx.application.Application;
import static javafx.application.Application.launch;
import javafx.scene.media.AudioClip;
import javafx.stage.Stage;

public class AudioClipApplication extends Application {

    @Override
    public void start(Stage stage) {

        AudioClip sound = new AudioClip("file:bell.wav");
        sound.play();

        stage.show();
    }

    public static void main(String[] args) {
        launch(args);
    }

}Remember to check your points from the ball on the bottom-right corner of the material!